Create and Manage Virtual Machines on Microsoft Azure

Azure Developer Certification Course (Az-204)
Azure virtual machines are Infrastructure as a service type offering from Microsoft which allows us to create VMs on cloud by allocating the required compute power and storage capacity. We can also set up a private network for these VMs and allow inbound and out bound connections to different other networks.
If you want to know more about Azure Virtual Machine, please follow previous article Understanding Azure Virtual Machines.
You can also consider doing our Microsoft Azure Certification from ScholarHat to upskill your career. Azure Virtual Machines are suitable for choosing as a desired resource for development environment as it provides more controlling power on the environmental features such as IIS as compared to Azure Platform as a service module. We can create a VM in many ways –
From the Azure Portal
Azure CLI
ARM templates
Steps to Create an Azure Virtual Machine (VM)
To get started with this, lets create a VM using the Azure portal.
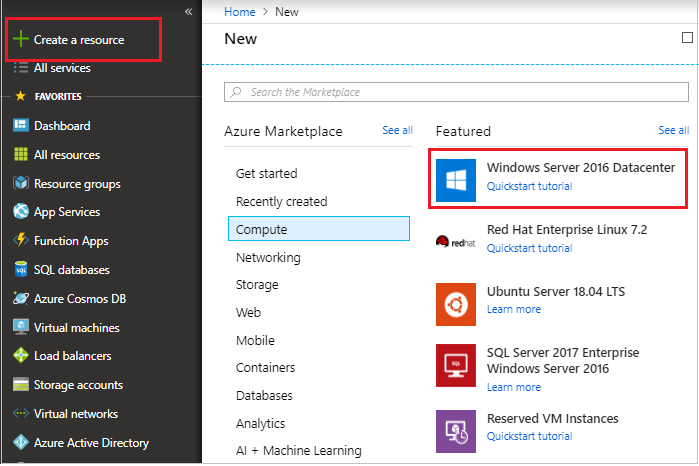
Login to the Azure Portal.
Click on Create Resource and select Windows Server 2016 Datacenter.
On the Create a VM screen, Fill in the Subscription, resource group name and VM name and image.
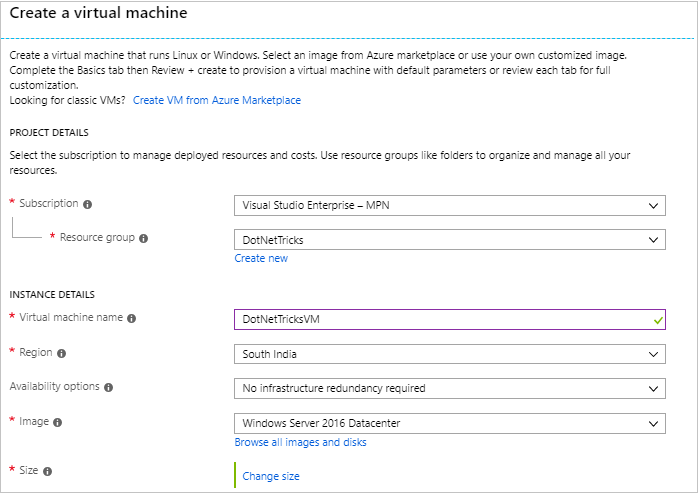
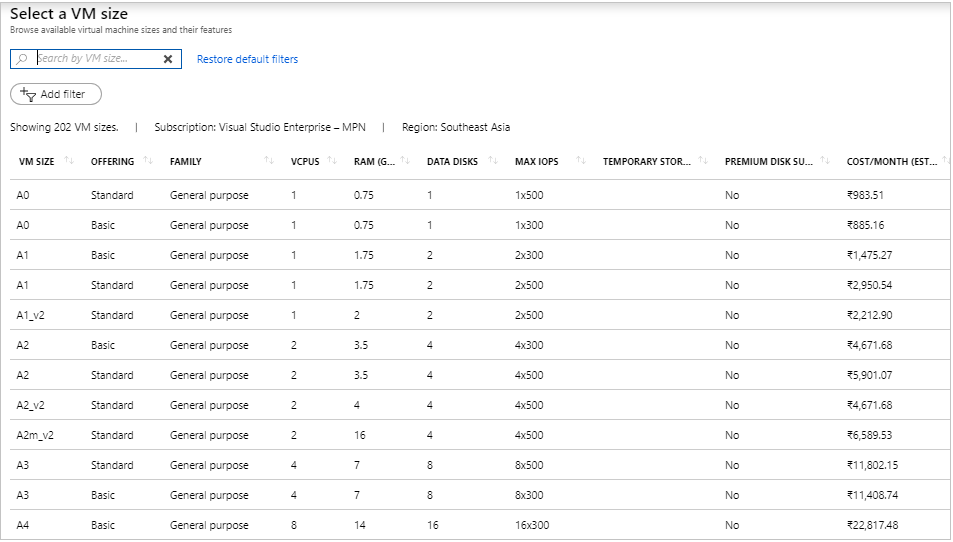
Click on Change Size hyperlink and choose the desire configuration. A total of 145 options are currently available with different configuration and prices. Not all options are available in all regions. Please select your region accordingly. For now, we will change the region from South India to South east Asia. By default, Standard DS1 v2 size will be selected.
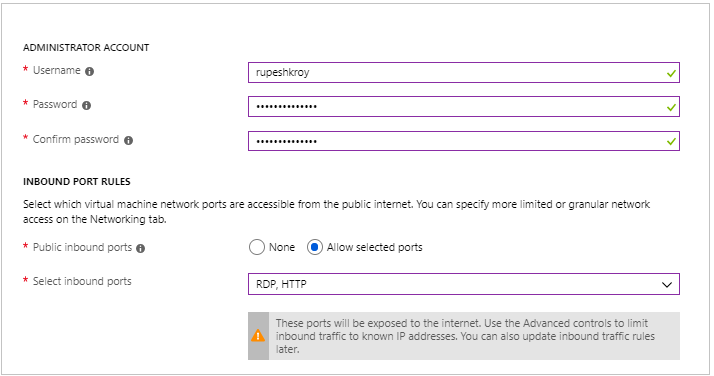
Fill in the administrator account credentials and Inbound ports.
We can create the VM with this much of information. But we do have other configurable sections, if required. Click on Next button to go to Disks section.
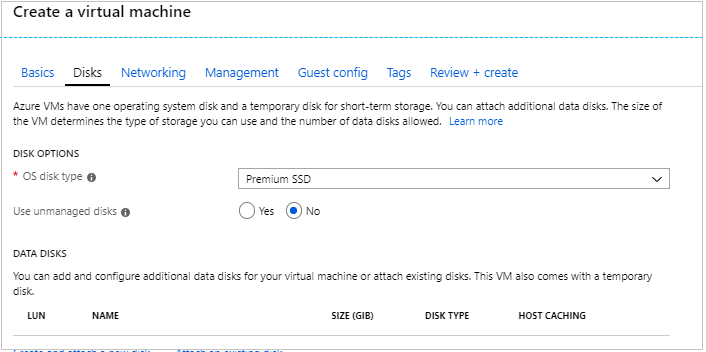
In this section, we first need to select the OS disk type – Here we have 3 options.Premium SSD, Standard SSD and Standard HDD. Premium SSD are solid state disks which has high IOPS and suitable for high-performance systems. Standard SSD are also backed by solid-state disks but has low performance as compared to premium one. And Standard HDD are supported by magnetic drives and are used when accessing data is less frequent.
Use Unmanaged Disks options allows the control over the disks used in VM. If it is required to store VHDs in own storage account then we should choose No option and connect to storage account which should be used to store disks. By Default, it is selected as No as Azure Manages the disks and we do not have access to the disks.
Click on Next to go to Networking section.
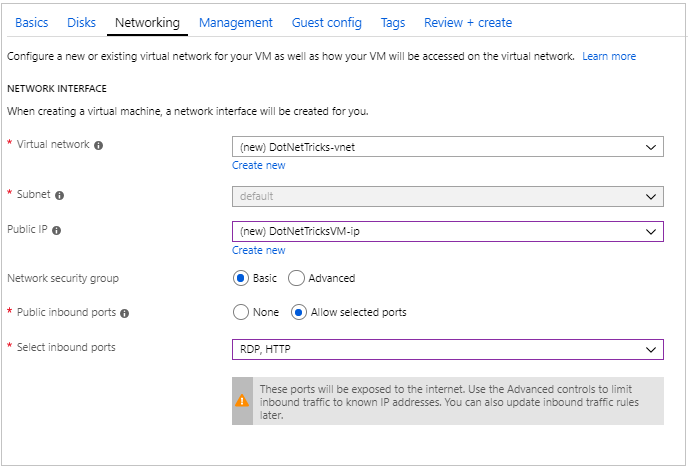
Create a Virtual Network for the VM and assign a subnet to it. A public IP address is also required in order to communicate to this VM from via internet.In a Network security group, the basic option allows to configure inbound ports but with advanced option we can create a network security group and define inbound and outbound rules to different ports.
Click on Next to configure management section.
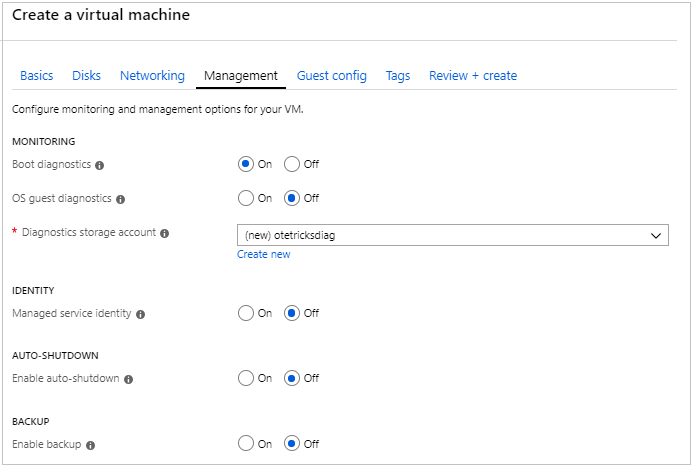
Boot Diagnostics logs startup events and is helpful to trace in case VM does not starts by seeing logs.OS guest diagnostics are generally written to an external storage account and helpful in case of creating alerts. Enabling Manage Service Identity will allow user management through Azure AD to access the VM.Auto Shut down feature is to shut down the VM during off-hours in order to reduce bills. We can enable Backup with Recovery Service Vaults. We can assign a back up policy which defines the frequency of backups and their retention period.
Click Next to go to Guest Configs.This is generally used to bring the VM in a desired state after initialization. For example, we can install some extension which can run custom PowerShell scripts on start up.
Click on Next to go to Tags sections. Tags are like dictionary objects with Name Value pair to group similar resources by providing same tags. This can also be useful to see consolidated billings by applying same tag to multiple resources in a resource group.
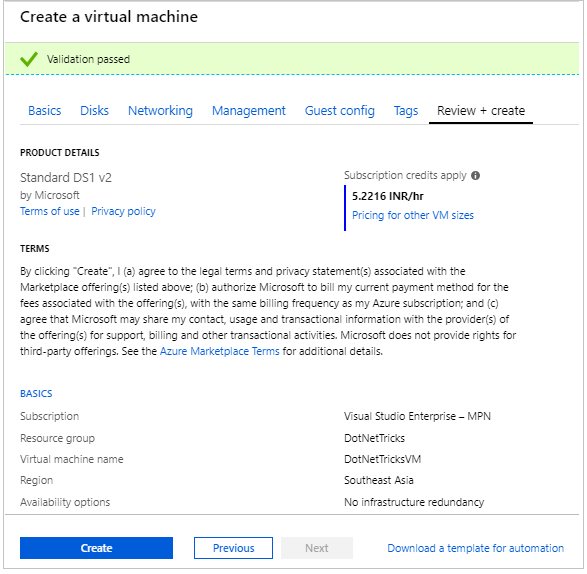
Click on Next and review all the settings selected. Now click on create.
Go to All Resources section on left panel and see the created resources. We will find below resources created:
Virtual machine
OS Disk
Network Interface
Public IP
Network Security Group
Virtual Network
Storage Account
Recovery Service Vault
Click on Virtual machine to get the RDP file. Check if you are able to log in to the VM with the administrator account entered in step 5.
Deploying ASP.NET Application to a Windows VM
In order to run and deploy an ASP.Net application, we need to first make sure that VM has all necessary dependencies to run the app.
Log in to the VM just created in previous section.
Open Windows PowerShell in administrative mode and run below command
Install-WindowsFeature Web-Server,Web-Asp-Net45,NET-Framework-Feature
Restart the web server so that system PATH updates take effect
 net stop was /y
 net start w3svc
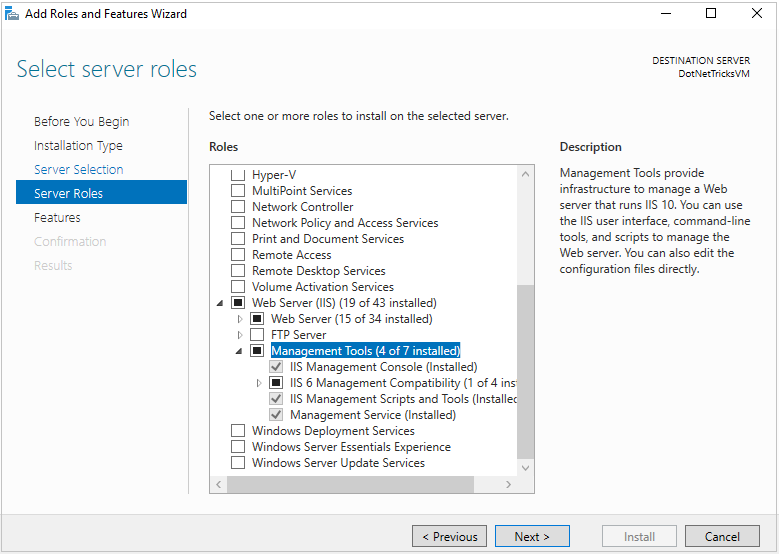
For Windows Server Virtual machine, use the Add Roles and Features wizard on the right click of Server name in Server Manager. On the Server Roles step, check the box for Web Server (IIS).
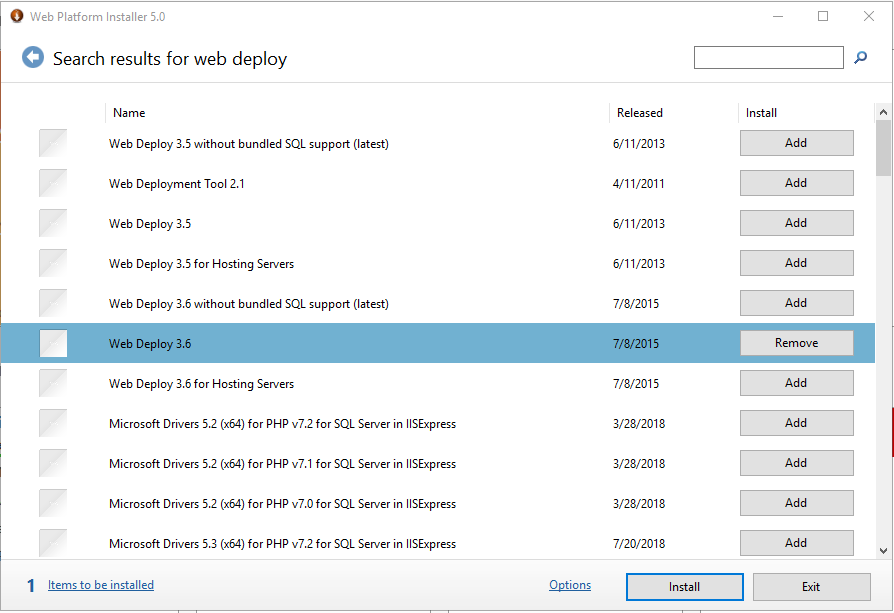
Install web deploy on the server to publish code into the VM.To install Web, Deploy, use the Web Platform Installer (WebPI). In the Web Platform Installer, you find Web Deploy in the Applications tab.
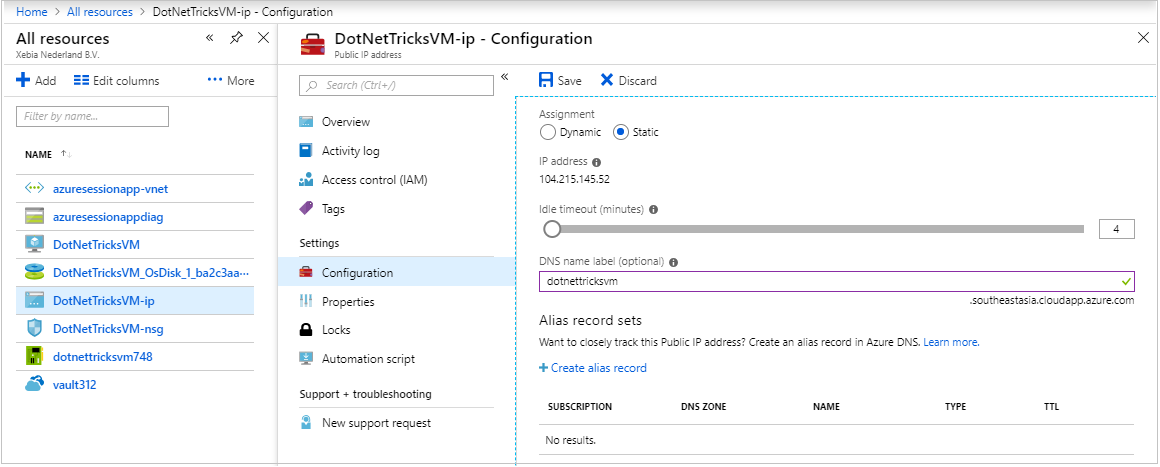
Go to Azure portal and change the IP type as static.
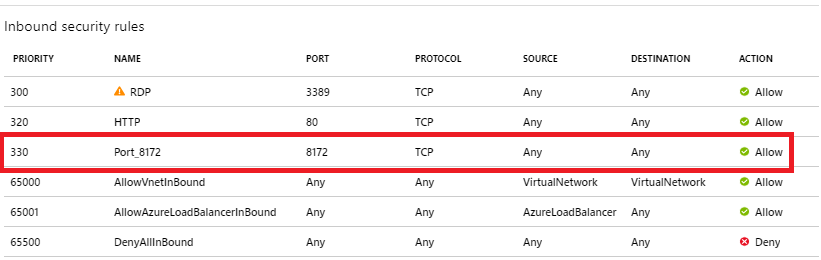
Add an Inbound rule to Network Security group of type TCP for port 8172 which is used to web deploy into IIS.
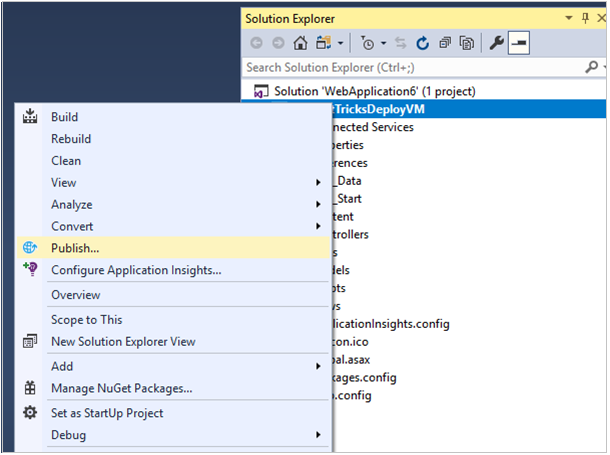
Open Visual Studio and create a new Asp.Net MVC application.
Right click on project file and publish.
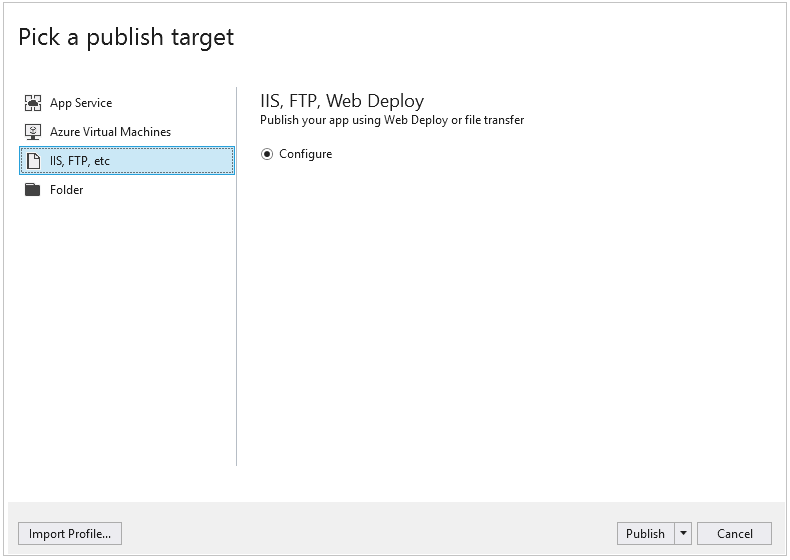
In the Publish window, Select IIS, FTP, etc. option.
Click on publish button at the bottom.
Fill the details of server name, site name administrative credentials and Destination URL and validate. A green tick will appear if the connection to remote VM is succeeded.
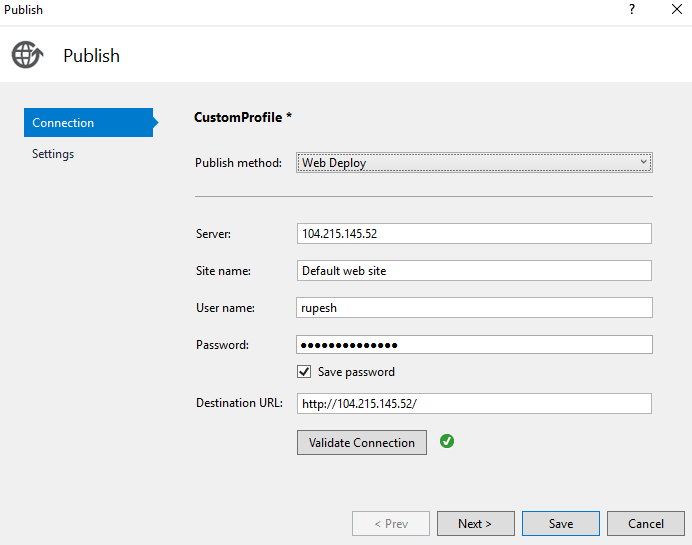
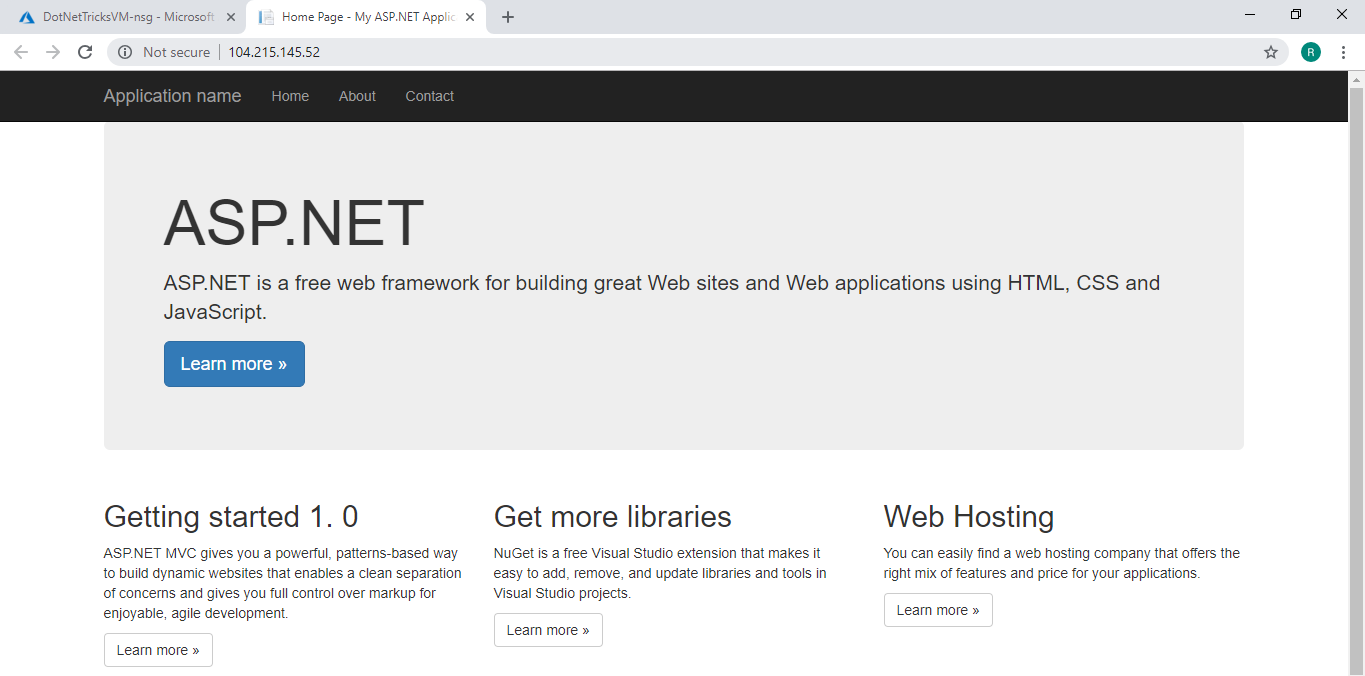
Click on Save to start publishing. Once it completes, the browser opens the URL with deployed code.
Adding Custom Domains
By default, Azure VMs are accessed via the IP address. But we can also provide DNS to the Azure VMs.
Go to the Public IP resource in Azure Portal and click on Configuration section.
Provide the DNS name and browse the link on browser. It displays the deployed application.
Now, we can add a custom domain to this VM by following the next steps.
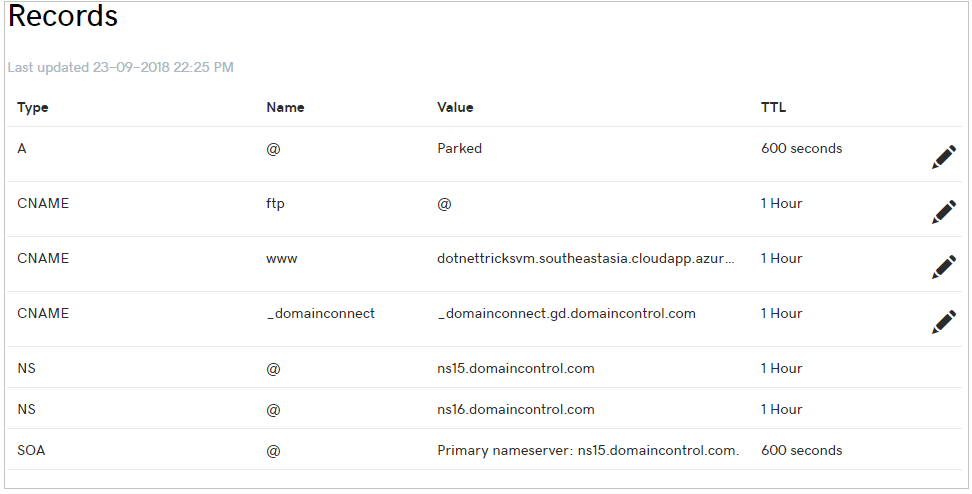
Go to the DNS Provider website and enter the DNS records section.
Add and entry of type CNAME with values as obtained at step 2.
The web application deployed on Azure VM is now available on the custom domain.
Summary
Choosing Azure Virtual machines as the development and deployment option in cloud gives a lot of flexibility and control over environment. We can increase or decrease the size of VM based on the load requirement and trace minute level events through boot diagnostics and guest diagnostics. With the option to configure network security group with subnets, it is possible to open and close ports as per inbound and outbound rules to ensure a highly secured system. Unlimited Azure online training will enable you to become a master in Azure services.
Take our free azure skill challenge to evaluate your skill

In less than 5 minutes, with our skill challenge, you can identify your knowledge gaps and strengths in a given skill.